
Learn how to create a tasty cupcake icon. You’ll learn how to create your own guide to trace from, stylish line art and then onto creating your own quick decorations in Adobe Illustrator.
Step 1
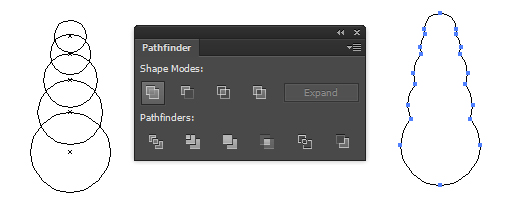
I’m going to create a guide to draw from for my cupcake by using the 3D Revolve Effect. With this in mind, I’m going to be creating half the cupcake. So first the frosting. This is made up by creating five circles using the Ellipse Tool (L), as shown below. I’ve then combined the shapes using Pathfinder > Unite.
Step 2
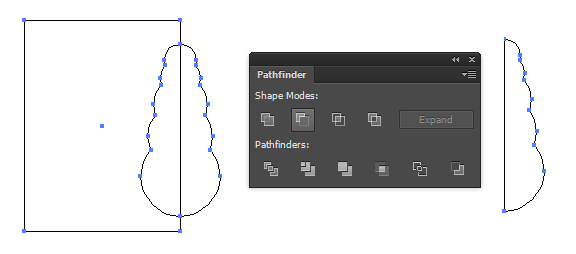
I used the Rectangle Tool (L) to draw a shape over half of the circle stack and used Pathfinder > Minus Front. You’ll then be left with half of the circle stack.
I used the Rectangle Tool (L) to draw a shape over half of the circle stack and used Pathfinder > Minus Front. You’ll then be left with half of the circle stack.
Step 3
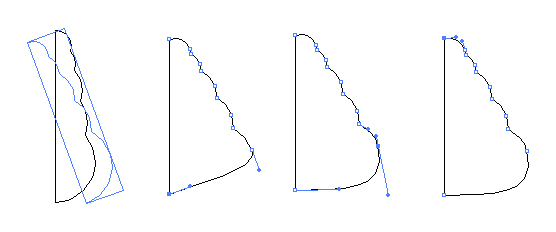
Use the Free Transform Tool (E) to rotate the shape slightly. Then use the Direct Selection Tool (A) to modify the handle bars on the points towards the bottom on top to create half of the shape, which will make the top of the frosting of our cupcake.
Use the Free Transform Tool (E) to rotate the shape slightly. Then use the Direct Selection Tool (A) to modify the handle bars on the points towards the bottom on top to create half of the shape, which will make the top of the frosting of our cupcake.
Step 4
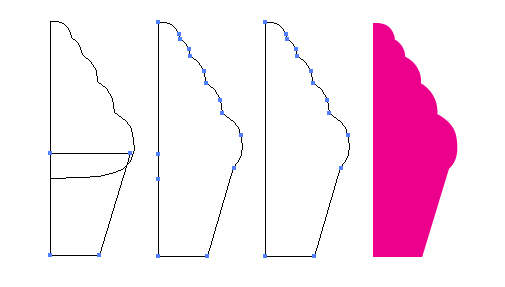
I then used the Pen Tool (P) to create the base of the cupcake, then used Pathfinder > Unite to combine the shapes. I used the Pen Tool (P) to then mouse over the two unnecessary points on the center of the shape and clicked to remove them. For the guide, the fill color is irrelevant so feel free to use whichever color you wish.
I then used the Pen Tool (P) to create the base of the cupcake, then used Pathfinder > Unite to combine the shapes. I used the Pen Tool (P) to then mouse over the two unnecessary points on the center of the shape and clicked to remove them. For the guide, the fill color is irrelevant so feel free to use whichever color you wish.
Step 5
With our half cupcake shape is selected, go to Effect > 3D > Revolve. I used the below settings and clicked on OK.
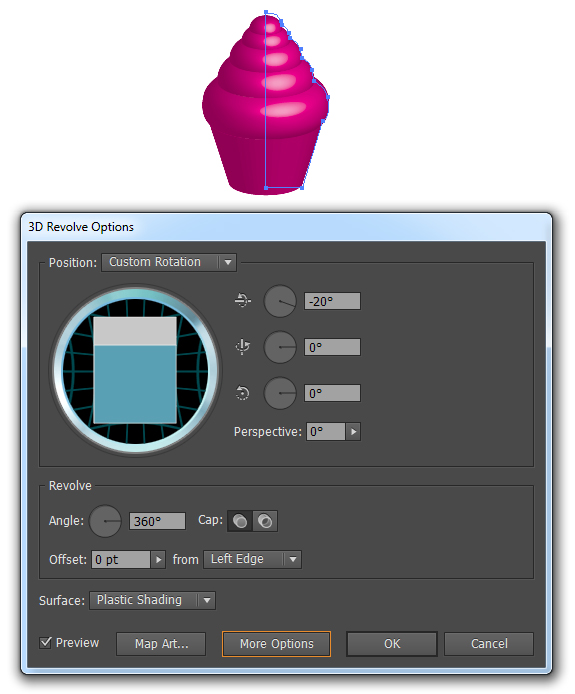
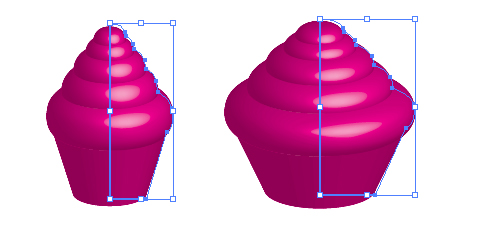
As you may have noticed, our cupcake seems a bit too slim. I used the Free Transform Tool (E) to increase the width of the original half cupcake shape. Whatever you do to the original shape will be replicated in the 3D Revolve effect in real time. This will make up your cupcake guide.
With our half cupcake shape is selected, go to Effect > 3D > Revolve. I used the below settings and clicked on OK.
As you may have noticed, our cupcake seems a bit too slim. I used the Free Transform Tool (E) to increase the width of the original half cupcake shape. Whatever you do to the original shape will be replicated in the 3D Revolve effect in real time. This will make up your cupcake guide.
Step 6
Now to use the 3D render as your guide. I placed a 50% Opacity white fill Rectangle (M) over the top of the guide to make it easier to trace. I’ve not Object > Expanded it, as even with using the Simplify option, it would create unnecessary points.
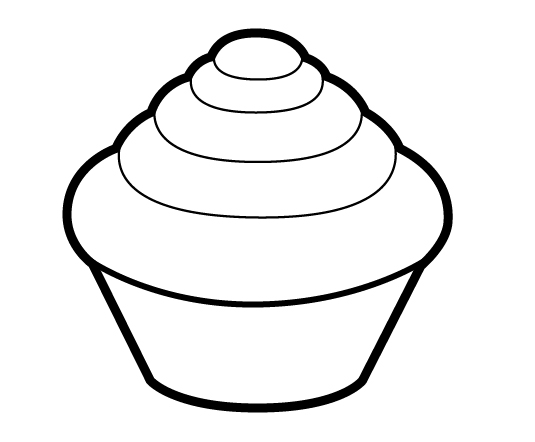
So I used the Pen Tool (P) to trace around the shape with a 3pt Stroke Weight black line. The bottom of the frosting has a 3pt line and the frosting tiers are a 0.75pt Stroke Weight black line.
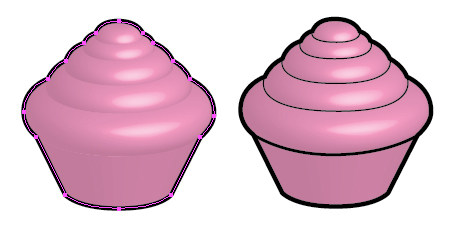
Now to use the 3D render as your guide. I placed a 50% Opacity white fill Rectangle (M) over the top of the guide to make it easier to trace. I’ve not Object > Expanded it, as even with using the Simplify option, it would create unnecessary points.
So I used the Pen Tool (P) to trace around the shape with a 3pt Stroke Weight black line. The bottom of the frosting has a 3pt line and the frosting tiers are a 0.75pt Stroke Weight black line.
Step 7
If you zoom into your cupcake, you may notice if you’ve connected point to point for the tiers, that the corners don’t match up to the smaller Stroke Weights lines.
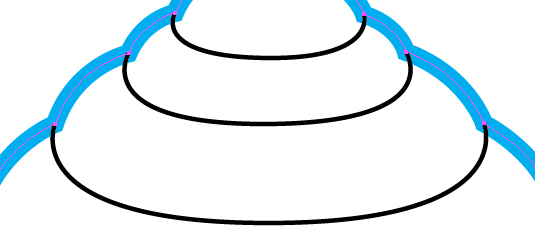
I resolved this is by moving each start and end point along the overall shapes outline until the corners matched up. You can do this with a lot more ease by enabling Smart Guides (Command + U).
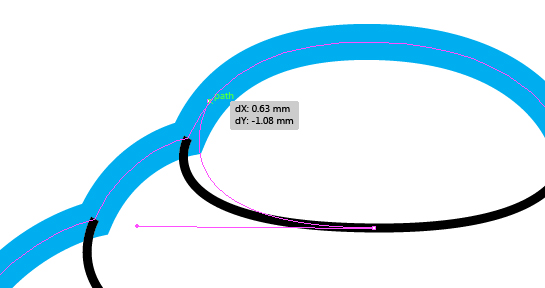
Here is my much tidier cupcake with it’s corners all flush.
If you zoom into your cupcake, you may notice if you’ve connected point to point for the tiers, that the corners don’t match up to the smaller Stroke Weights lines.
I resolved this is by moving each start and end point along the overall shapes outline until the corners matched up. You can do this with a lot more ease by enabling Smart Guides (Command + U).
Here is my much tidier cupcake with it’s corners all flush.
Step 8
For the cupcake casing, I used the Line Segment Tool (\) to draw each with a black 0.75pt Stroke Weight. I started in the center to split it in half, then quarters and then eighths.
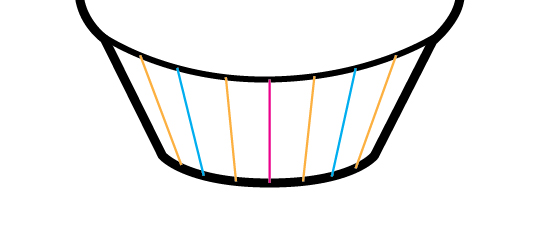
For the cupcake casing, I used the Line Segment Tool (\) to draw each with a black 0.75pt Stroke Weight. I started in the center to split it in half, then quarters and then eighths.
Step 9
Once your line art is done, select all of the elements and Group them up (Command + G). Then use the Live Paint Bucket (K) to fill each one of the shapes. I opted for a light pink cupcake and I gave the tiers alternate shades of pink. I duplicated this effect in the cupcake casing.
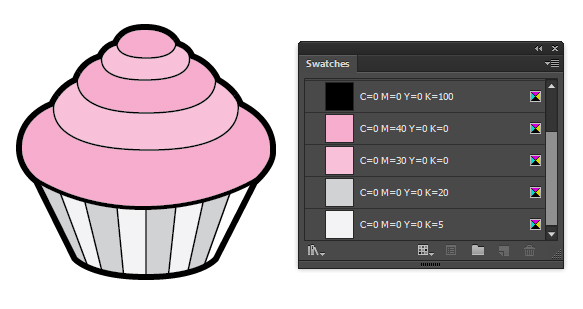
Once your line art is done, select all of the elements and Group them up (Command + G). Then use the Live Paint Bucket (K) to fill each one of the shapes. I opted for a light pink cupcake and I gave the tiers alternate shades of pink. I duplicated this effect in the cupcake casing.
Step 10
With the Live Paint group is selected, I went to Object > Expand and unticked “Stroke”, then clicked on OK.

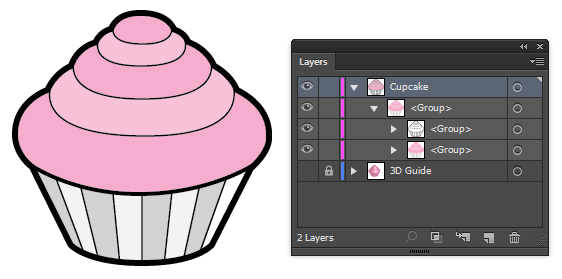
If you drill down into the group, you’ll see that it will have the black line art in one group, which will be on top of a group that will have all your shapes. This makes it easier to modify all your line art together and your fills together.
With the Live Paint group is selected, I went to Object > Expand and unticked “Stroke”, then clicked on OK.
If you drill down into the group, you’ll see that it will have the black line art in one group, which will be on top of a group that will have all your shapes. This makes it easier to modify all your line art together and your fills together.
Step 11
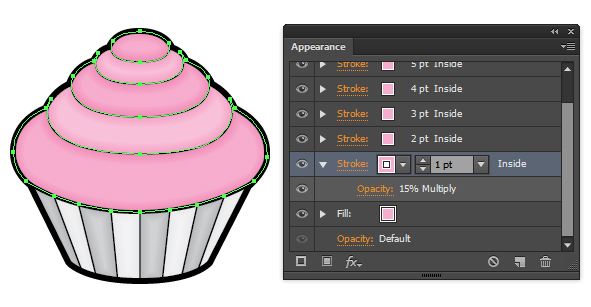
I’m going to use the Appearance panel for each one of the shapes to create a 100% vector inner glow effect. You can see more about it in this tutorial.
For each shape, I’ve given the shape five duplicated strokes which are Aligned Inside from 1pt up to 5pt Stroke Weight. They have the same stroke color as the fill and are all set to Blending Mode Multiply with Opacity 15%. You’ll need to do this for all the shapes for the frosting and the cupcake casing.
Step 12
I locked the colored shape group, as I want to use the Direct Selection Tool (A) to select specific lines to recolor them and sort them into two different groups.
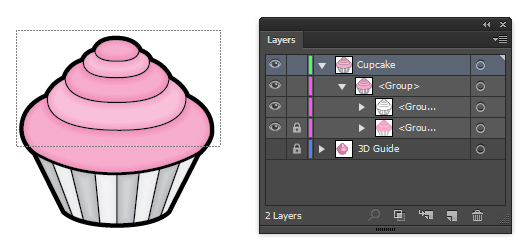
The frosting will have its own group with the new stroke color of a darker pink (C=0, M=80, Y=0, K=0). The cupcake casing will be a medium gray (C=0, M=0, Y=0, K=60). These two new groups will still be on top of the color filled shapes.
I locked the colored shape group, as I want to use the Direct Selection Tool (A) to select specific lines to recolor them and sort them into two different groups.
The frosting will have its own group with the new stroke color of a darker pink (C=0, M=80, Y=0, K=0). The cupcake casing will be a medium gray (C=0, M=0, Y=0, K=60). These two new groups will still be on top of the color filled shapes.
Step 13
I’m going to use a circular blend art brush (which you can create from this jellyfish tutorial) to add a highlight to each one of the frosting tiers. The stroke color will be the lightest pink and will be set to Blending Mode Screen with Opacity 100%. I started with the largest Stroke Weight on the bottom tier at 1.5pt and changed it all to way to the smallest at 0.25pt at the top.
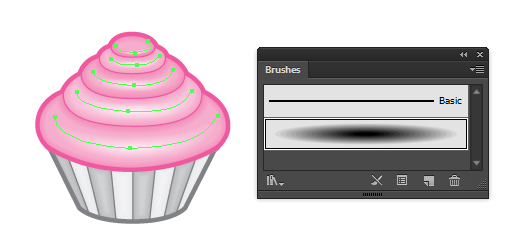
I’m going to use a circular blend art brush (which you can create from this jellyfish tutorial) to add a highlight to each one of the frosting tiers. The stroke color will be the lightest pink and will be set to Blending Mode Screen with Opacity 100%. I started with the largest Stroke Weight on the bottom tier at 1.5pt and changed it all to way to the smallest at 0.25pt at the top.
Step 14
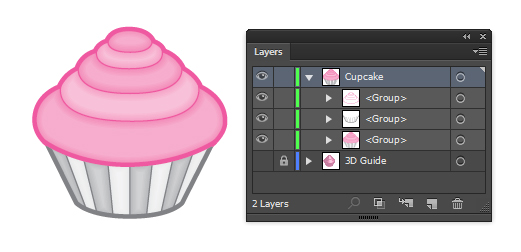
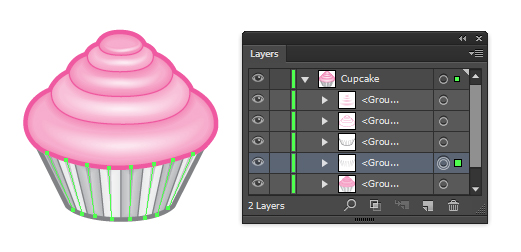
For in between the folds of the cupcake casing, I added further vertical lines with the Line Segment Tool (\). These use the Profile “Width Profile 4″ and a Stroke Weight of 3pt. They use the light gray stroke color (C=0, M=0, Y=0, K=20) and are set to Blending Mode Multiply with Opacity 100%.
So they don’t overlap the initial line art, they are grouped underneath the other line art ,but on top of the color filled shape group.
Step 15
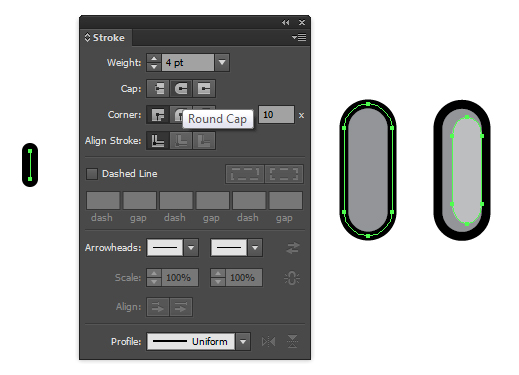
I’m going to create some sprinkles to use on the cupcakes. I drew a small line with the Line Segment Tool (\) with a 4pt Stroke Weight and Round Caps. I then went to Object > Expand and made sure Stroke was ticked. I then gave it a black 0.75pt stroke and a mid gray fill.
I duplicated the shape and gave it a lighter gray fill with a null stroke. I then used the Free Transform Tool (E) to reduce the scale and aligned it to the end of the shape, but not to overlap the black stroke. Once done, I Grouped the two shapes (Command + G).
Step 16
In the Brush panel, I click on New Brush > Scatter Brush and used the below settings. The CS6 options do look slightly different to the previous versions, however they have exactly the same options so not to worry.
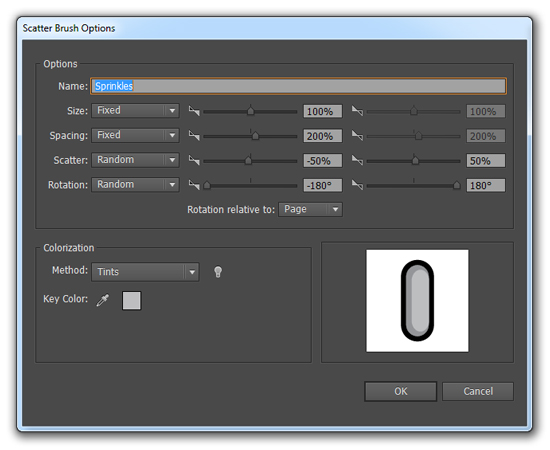
I then used the Paintbrush Tool (B) to add blue and purple strokes around the cupcake for my multi-colored sprinkles.

View Full Tutorial Here
In the Brush panel, I click on New Brush > Scatter Brush and used the below settings. The CS6 options do look slightly different to the previous versions, however they have exactly the same options so not to worry.
I then used the Paintbrush Tool (B) to add blue and purple strokes around the cupcake for my multi-colored sprinkles.
View Full Tutorial Here
No comments:
Post a Comment